Reverse a released claim with no check
IP or Pended—HP status to a Released—R status, the claim is included in a check run for payment processing (usually in the form of a check). The check run process updates the R claim status to paid—P.
R status), remove it from the check run before adjusting it. (Administration Process > Claims Checks and EOBs > Check Run Claim Removal)Reverse, correct, and reissue the claim
Use the following instructions when a claim is in R—Released status, verify the claim hasn't been selected for a check run, no checks were printed, and the claim had a payment error.
Go to: Home > Administration Processes > Claims Adjustments > Claim Reversal/Void
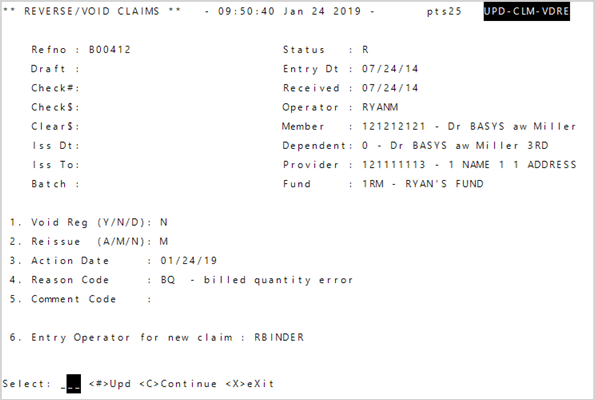
- Enter the claim’s
Refno. - At
Void Reg—Register enterNsince there is no check. - Enter
M—manual inReissueto create a new claim to correct. - You’re prompted to enter the new received date for the new claim at the bottom of the screen.
- Enter the date action is taken in
Action Dateor pressEnterto use today’s date. -
Enter the required adjustment
 Reason Code
Allto display a window with options to select from. Your operator ID automatically shows as theEntry Operator. - Enter
Cto continue. The original claim refno displays at the bottom of the screen. - Press
Enterand the reversed refno displays. The claim reverses and any informational or error messages display. Any accumulators are calculated and automatically adjusted. - Press
Enteragain and the new claim refno displays at the bottom of the screen. -
Press
Enteragain to open the new claim.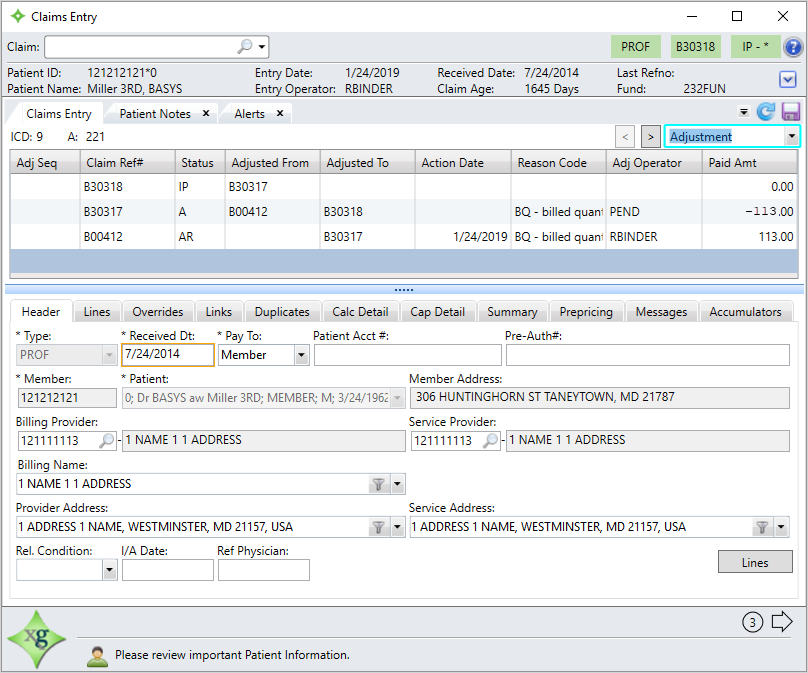
-
Correct and save the claim and it will be in
R—Released status.Important! If you reverse and reissue the claim accidentally, reverse the reissued claim and manually reissue another claim. Don’t void or reverse the original reversal (e.g. A00029 in the example below), because a duplicate payment will get created.
Examples are given for illustration. Other errors can cause the same adjustments.
| Reference # | Paid | Status | |
|---|---|---|---|
| Entered | A00028 | $240.00 | R—Released |
| Adjusted | A00028 | $240.00 | AR—Adjusted Released |
| A00029 | -$240.00 | A—Adjusted | |
| A00030 | $300.00 | R—Released |
| Reference # | Paid | Status | |
|---|---|---|---|
| Entered | A00028 | $240.00 | R—Released |
| Adjusted | A00028 | $240.00 | AR—Adjusted Released |
| A00029 | -$240.00 | A—Adjusted | |
| A00030 | $200.00 | R—Released |
| Reference # | Paid | Status | |
|---|---|---|---|
| Entered | A00028 | $240.00 | R—Released |
| Adjusted | A00028 | $240.00 | AR—Adjusted Released |
| A00029 | -$240.00 | A—Adjusted | |
| A00030 | $240.00 | R—Released |