Create and update user roles that determine system access to sessions![]() Work type impacting the menu items and information available ( e.g. Home, Member, Claims, etc.)., functions, and data.
Work type impacting the menu items and information available ( e.g. Home, Member, Claims, etc.)., functions, and data.
If this is a new user role:
- Add an authorization role. Define the role's access to sessions, functions, tabs, subtabs, and features.
- Create a general fund control to grant access to members and dependents funds.
- Add a correspondence fund control to grant access to correspondence items by fund.
- Add a status code control to grant access to add, edit, or delete specified member status codes.
- Add a pension action code control to deny access to add, edit, and delete specified pension action codes.
- Associate the role you created with users in the Profile Editor. See Set up a user profile.
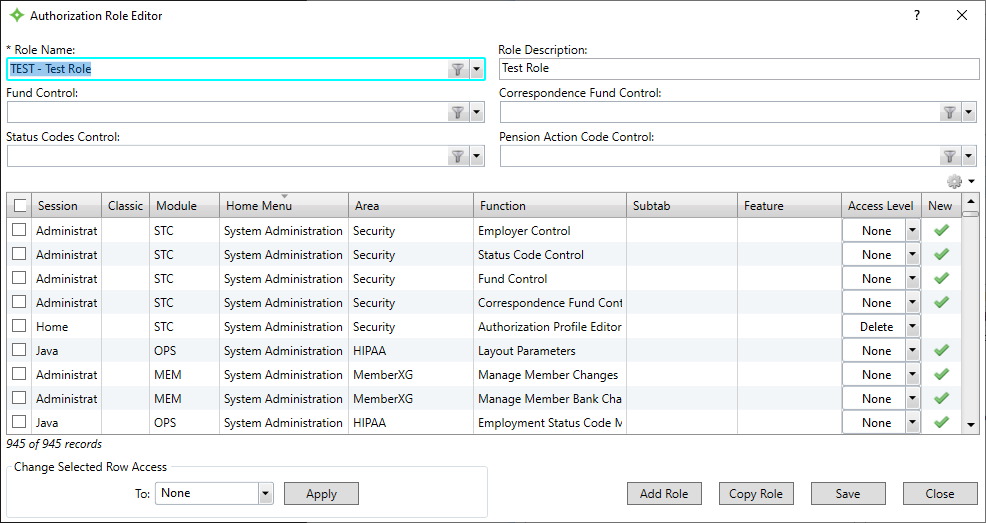
Delete access to ServiceXG functions and Display access to Classic functions). Go to: Home > System Administration > Security > Authorization Role Editor
* indicates a required field
Add an authorization role
If there's a role you'd like to begin with, you can use the ![]() Copy Role
Copy Role
- Click
Add Role. - Enter the role name and click
Add. - Depending on the role, select from the following options as necessary. You can type a few characters to he
- Fund Control
- Correspondence Fund Control
- Status Codes Control
- Pension Action Code Control
-
Set the access levels. The table lists all sessions, functions, and subtabs in your system. The default access level is
Nonefor all rows.Hint: We recommend you filter the table to display only the access levels you want to change. For example, you can filter the table to display only Member session functions or to display any new functions, sort the by theNewcolumn. Refer to Table features for details on how to filter entries.- To update a single row, simply change the access level and select the check box for that row.
- To update multiple rows at the same time, select the check boxes in the first column of the rows to change.
-
To select all rows, select the check box in the header (the very first check box).
-
In the
Change Selected Row Accessarea at the bottom of the screen, select the access setting for the selected row (s) and clickApply.
- Click
Saveto save the role. To assign the role to a user, see Set up a user profile.
Update an authorization role
- Select a
Role Namefrom the list. - Edit the role's settings as necessary.
- Click
Apply. - Click
Saveto save your changes. - When you're done making changes, click
Closeto exit the window.