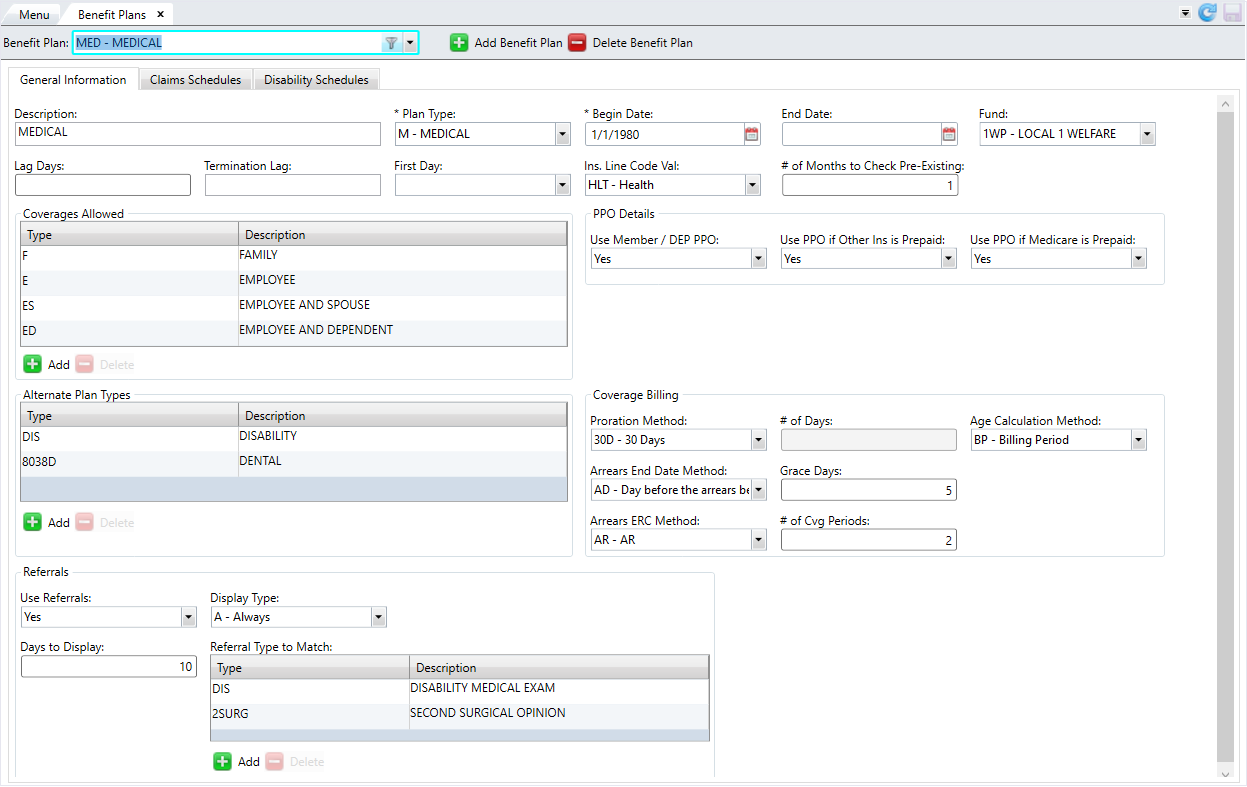
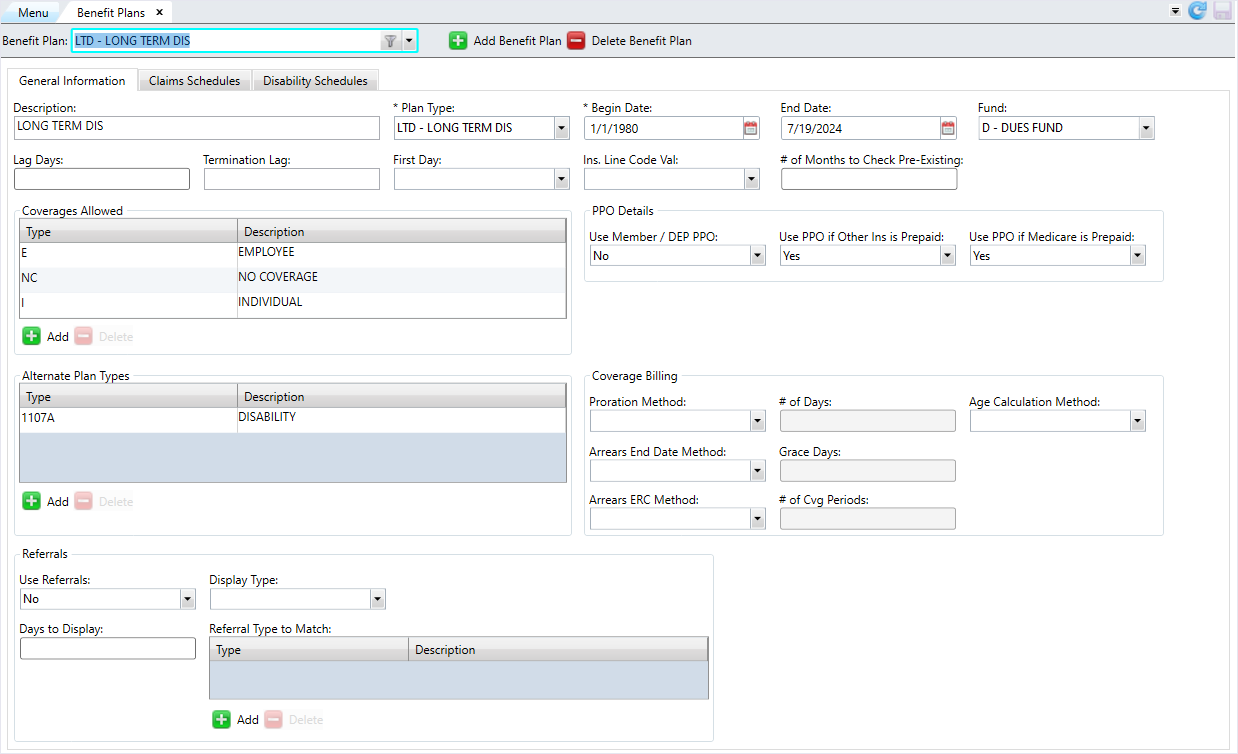
Manage Benefit Plans
A benefit plan, which requires a subgroup, identifies the benefits an individual receives as the result of their association with the subgroup. Claims, Disability, Eligibility, and COBRA are affected by Benefit Plans.
Go to: Home > Codes and Criteria > Fund Relationships > Benefit Plans
The Benefit Plans screen contains three (3) tabs — General Information, Claims Schedules, and Disability Schedules.
* indicates a required field
| Field | Description |
|---|---|
| General Information tab | |
| *Benefit Plan Code | The name of the benefit plan. |
| Description | A brief description of the plan. |
| *Plan Type | A code identifying the plan and its priority. For example, Medical, Dental, etc. See Manage Plan Types for more information. |
| *Begin Date | The initial effective date for the benefit plan. |
| End Date | The termination date for the benefit plan. |
| Fund |
The fund linked to the benefit plan. Note: Enter the fund if using Premium Billing to update eligibility.
|
| Lag Days |
The number of days after the hire date that the eligibility plan begins. Enter up to three (3) digits. Note: This field is only used with Single Employer Eligibility -
Version 4.
|
| Termination Lag |
Determines when benefits will terminate for a member who loses eligibility:
Note: This field is only used with Eligibility Version 6 and is linked to Member Status Codes with a type of
E. |
| First Day |
Indicates if eligibility is effective on the first day of the month.
Note: This field is only used with Single Employer Eligibility -
Version 4.
|
| Ins. Line Code Value |
A predefined HIPAA insurance code identifying an insurance product. Associate your benefit plan code with the predefined HIPAA insurance line code when needed for HIPAA transmissions. The HIPAA insurance line codes are:
|
| # of Months to Check Pre-Existing | The number of months between the member's eligibility date and a claim's incurred date in which a user processing a claim will be prompted for pre-existing conditions. Enter up to three (3) digits. |
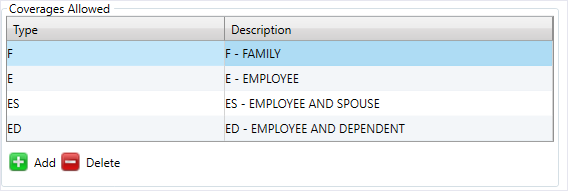
| Coverages Allowed | The coverage types allowed under this benefit plan. |
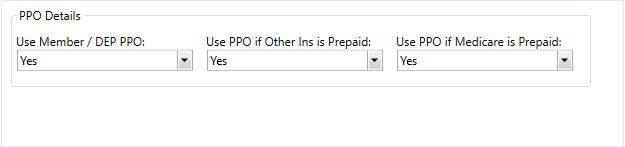
| Use Member / DEP PPO |
Determines if the member/dependent PPO is used for the benefit plan:
|
| Use PPO if Other Ins is Prepaid |
Determines if a PPO will be used if other insurance prepays:
|
| Use PPO if Medicare Prepaid |
Determines if a PPO will be used if Medicare prepays.
|
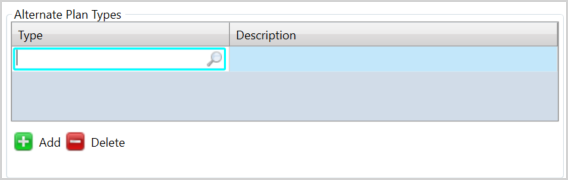
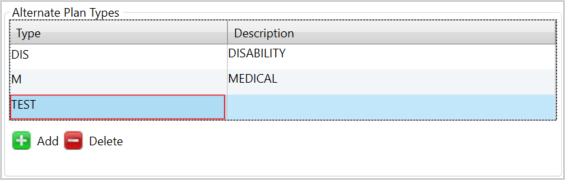
| Alternate Plan Types | The alternate plan types allowed in this benefit plan. |
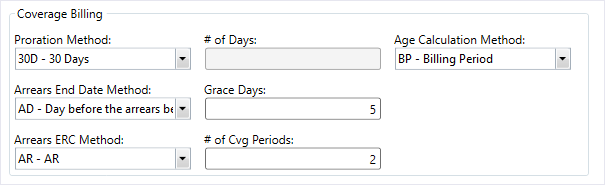
| Proration Method |
Indicates the prorated method that will be
applied. For premium billing, the
|
| # of Days |
The number of cut-off days for the |
| Age Calculation Method |
Indicates the Benefit Plan age calculation to be used for CVB rate calculation. For this to be considered, the CVB
|
| Arrears End Date Method |
Determines how the CVB calculation adjusts eligibility for those coverage periods in arrears:
|
| Grace Days |
The number of grace days for the |
| Arrears ERC Method |
Determines how the arrears end reason code (ERC) will be constructed for eligibility.
|
| # of Cvg Periods |
The number of coverage periods for the |
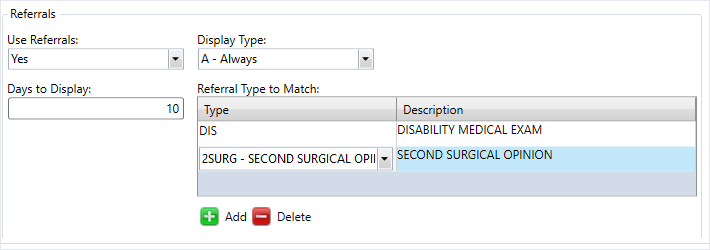
| Use Referrals |
Denotes if referral tracking is used in this benefit plan:
|
| Display Type |
Determines when a referral will be displayed in the Referral window:
|
| Days to Display |
Designates the number of days before or after the claim date of service to display the list of referrals for linking in claims entry and processing. Enter up to five (5) digits. Note: If this field is set to 30 and the referral starts 10/31 and ends 11/30, then it would display for claims with dates 10/1 through 12/30. If this field is 99999, then it display all referrals.
|
| Referral Type to Match | The referral type to match. |
| Claims Schedules tab | |
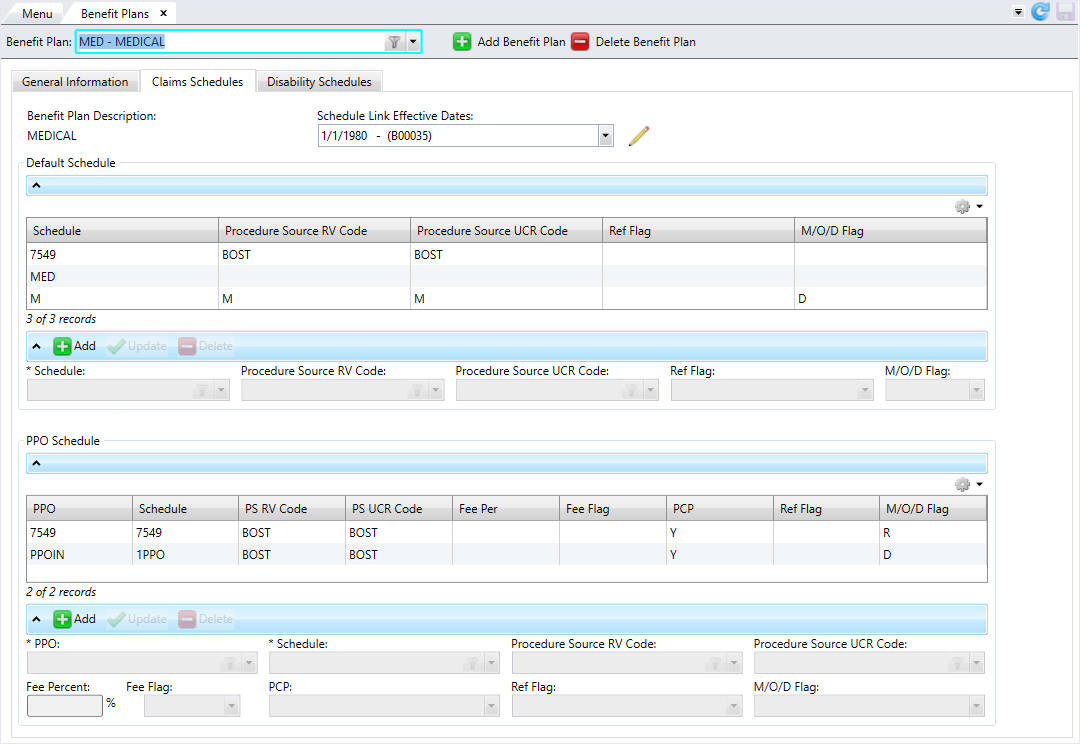
| Benefit Plan Description | The description of the benefit plan defined on the General Information tab. |
| Schedule Link Effective Dates | The effective date range for the schedule. The current range displays by default. |
| *Schedule | The default schedule for the claims in this benefit plan. |
| Procedure Source RV Code | The procedure code for the relative value. This code will override the schedule default code if no procedure source code is found on the benefit code level. |
| Procedure Source UCR Code | The procedure code for the UCR. This code will override the schedule default code if no procedure source code is found on the benefit code level. |
| Ref Flag |
Determines if referrals are required to use this schedule:
Note: Multiple entries could exist here if different schedules are used for PCP claims and referral claims.
|
| M/O/D Flag |
Medicare / Other insurance / Dual COB flag.
Note: Only one
R or D type is allowed per effective date schedule link. |
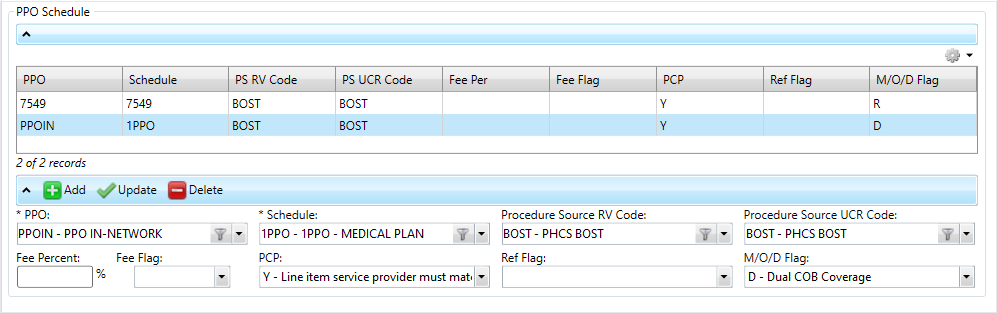
| *PPO | The PPOs that can be used in this benefit plan. |
| *Schedule | The schedule the PPO uses. |
| Procedure Source RV Code | The procedure code for the relative value. If the PPO is used for processing a claim, the pricing information here will override the schedule defaults. |
| Procedure Source UCR Code | The procedure code for the UCR. If the PPO is used for processing a claim, the pricing information here will override the schedule defaults. |
| Fee Percent | The fee percentage. This specifies the administrative fee for the internal PPO. Enter a number between 0 to 100 which represents the percentage. |
| Fee Flag |
The fee's billing method:
|
| PCP |
The PCP requirements for using the aligned schedule and other aligned information:
|
| Ref Flag |
Determines if referrals are required to use this schedule:
Note: Multiple entries could exist if different schedules are used for PCP claims and referral claims.
|
| M/O/D Flag |
Medicare / Other insurance / Dual COB flag.
Note: Only one
R or D type is allowed per effective date schedule link. |
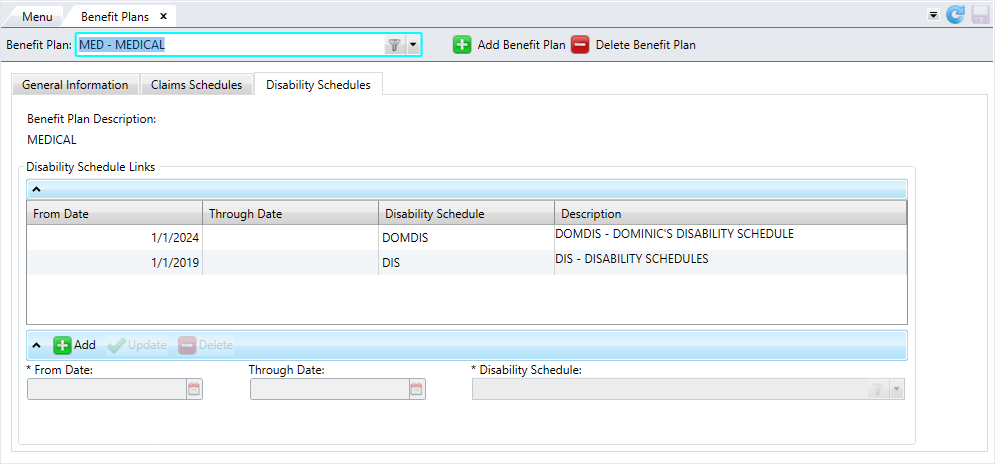
| Disability Schedules tab | |
| From Date | The from date for the disability schedule. |
| Through Date | The through date for the disability schedule. |
| Disability Schedule | The disability schedule. |
| Description | A description of the disability schedule. |
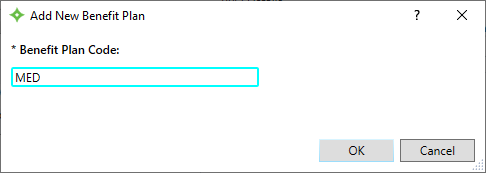
Add a benefit plan
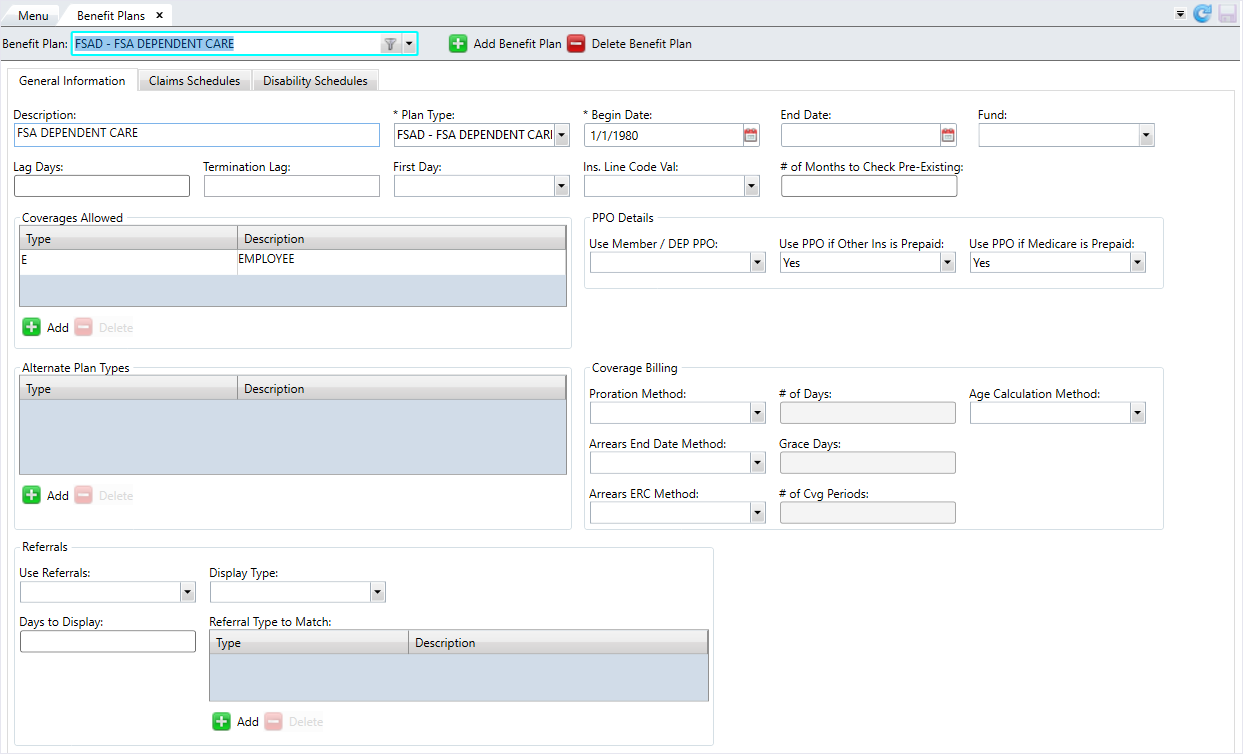
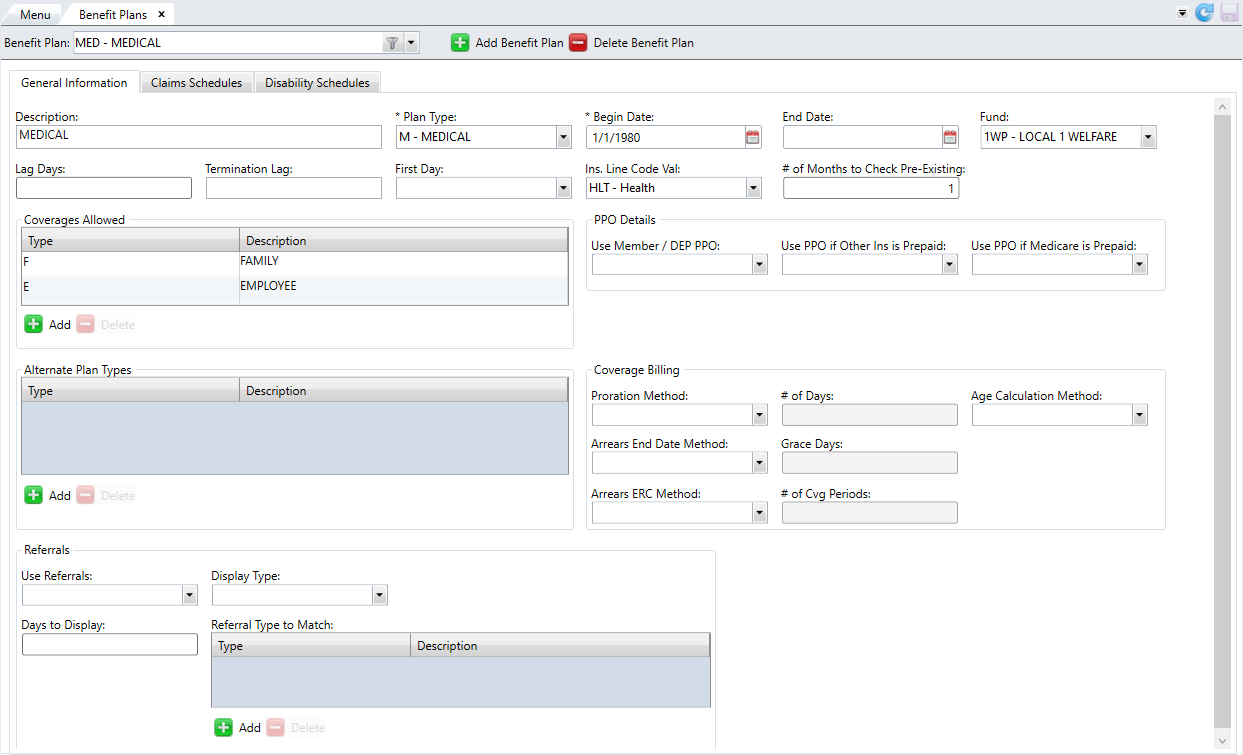
General Information tab
On this tab, define the overall settings for the benefit plan, including coverages, referrals, alternate plan types, and coverage billing and PPO information.
- Click
 .
. - Enter a name for the benefit plan code and click
 .
. - Enter a description for the benefit plan code.
- Select the
Plan Type. - Select the plan's
Begin Date. If applicable, select theEnd Date. - Select the
Fundlinked to the benefit plan. - At
Lag Days, enter the number of days after the hire date that the eligibility plan begins. - Choose the
Termination Lagto determine when benefits terminate for a member who loses eligibility. - At
First Day, chooseYesif plan eligibility is effective on the first day of the month or chooseNoif it isn't effective on the first day. - Select the
Insurance Line Code Valueto send in HIPAA transmissions. - At
# of Months to Check for Pre-Existing, enter the number of months between the member's eligibility date and claim incur date for which a user processing claims will be prompted for pre-existing conditions. - In the
Coverages Allowedtable, define the coverages that are allowed under the benefit plan. You must add at least one coverage to save the benefit plan. - Click
 to enter a coverage code. The description of the coverage code automatically displays. (See Manage Coverages for more information.) Note that you can't add a duplicate coverage code.
 - If you need to delete a coverage code, select the row you want to delete from the table and click
 .
. - In
PPO Details, select how PPOs work for this benefit plan. - In
Use Member/Dep PPO, chooseYesif a PPO is used orNoif a PPO isn't used. - In
Use PPO if Other Ins is Prepaid, chooseYesif a PPO is used when other insurance prepays orNoif the PPO won't be used if other insurance prepays. - In
Use PPO If Medicare Prepaid, chooseYesif a PPO is used when Medicare prepays orNoif the PPO won't be used if Medicare prepays. - In the
Alternate Plan Typestable, define the different plan types that are allowed to be used with the benefit plan. For example, a plan type ofMEDmay be a comprehensive plan including dental and/or vision benefits. (See Manage Plan Types for more information.) - Click to enter a plan type.
- Enter the plan type and press the search icon or
Enterto search for the plan type. If found, theDescriptionwill display. Note that you can't add a duplicate plan type. - If the plan type you entered doesn't exist, a red border displays around the type. Validate the name of the type you want to enter in Manage Plan Types.
- If you need to delete an alternate plan type, select the row you want to delete from the table and click .
- In the
Coverage Billingsection, add the information needed for coverage billing options. - Choose the
Proration Method. If you selectedCOorCOH, enter the# of Days. - Choose the
Age Calculation Method. - Choose the
Arrears End Date Method. If you selectedAD, enter the number ofGrace Days. - Choose the
Arrears ERC Method. If you selectedARorARC, enter the# of Cvg Periods. - In the
Referralssection, determine if referrals are required for this benefit plan. - At
Use Referrals, chooseYesif the benefit plan uses referral tracking orNoif it doesn't. - Choose when a referral displays in the Referral window in
Display Type. - At
Days to Display, enter the number of days before or after the claim date of service to display the list of referrals for linking in claims entry and processing. - In the
Referral Type to Matchtable, select the referral types to match.- Click to enter a referral type. The description of the referral type automatically displays. Note that you can't add a duplicate referral type.
- If you need to delete a referral type, select the row you want to delete from the table and click .
- Click
- After reviewing the information, click
 to save.

Claims Schedules tab
This tab contains the claim schedule information for you to manage the default claim and PPO schedules.
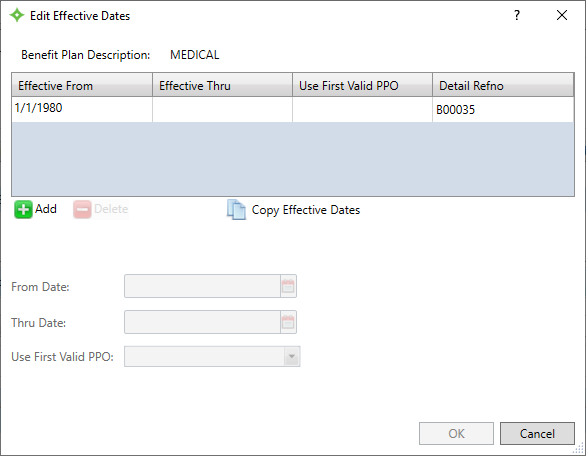
The Benefit Plan Description and the Schedule Links Effective Dates initially display when you navigate to this tab. The current effective date period displays by default, but you can change the effective date range to view other schedule data for different effective periods.
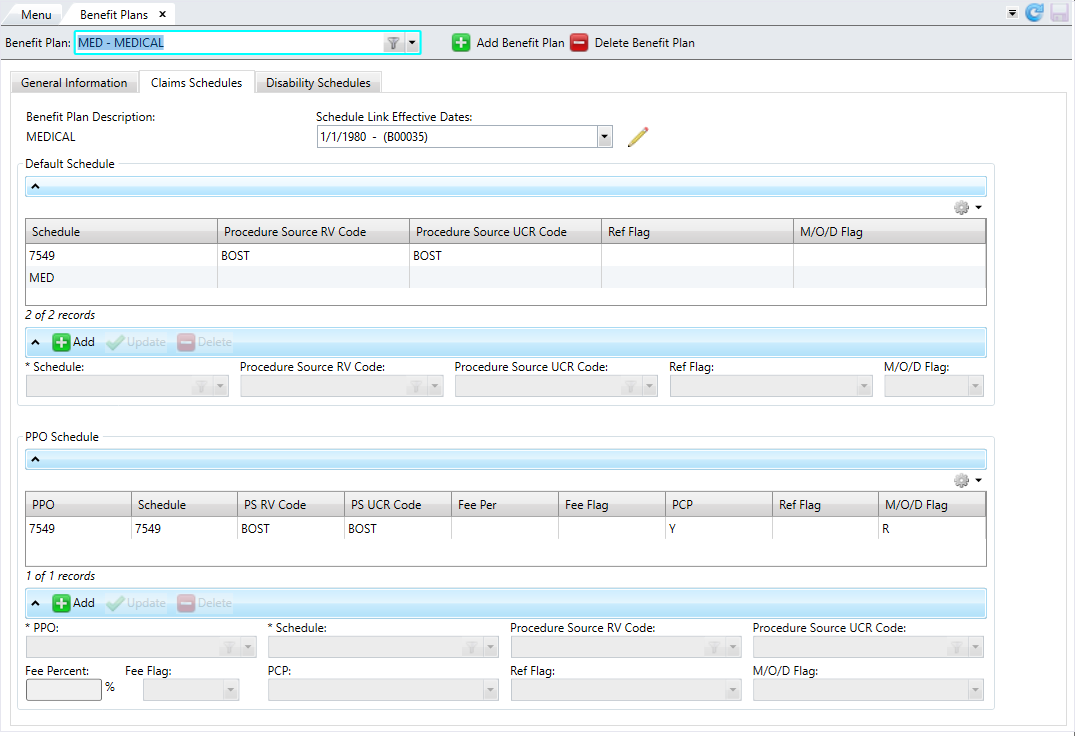
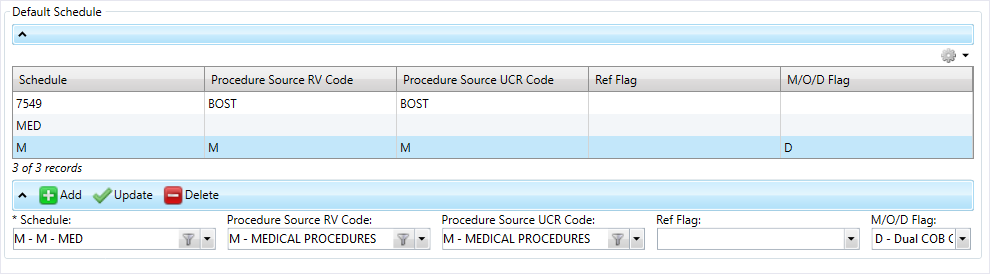
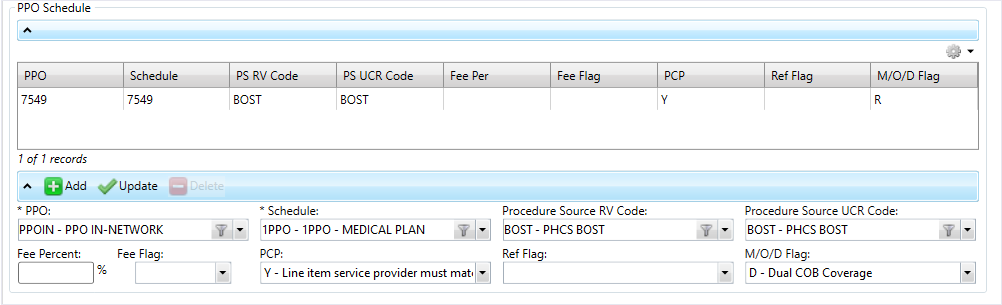
There are two tables to update: Default Schedule and PPO Schedules:
-
In the
Default Scheduletable, add the claim schedule codes that are appropriate for the selected effective dates under this benefit plan. -
In the
PPO Scheduletable, add each PPO that can be used for the selected effective dates under this benefit plan.
You can Export from table or Print from table from the table options menu ![]() .
.
- Select the
Claims Schedulestab. - If you want to change the
Schedule Link Effective Daterange, click .
. - In the window, click to enter the
FromandThru Dates. - At
Use First Valid PPO, chooseYesif the first valid PPO will be selected orNoif the PPOs aren't prioritized. This field is used for providers who belong to multiple PPOs. IfYes, the system automatically chooses the first PPO found in the benefit plan hierarchy when processing claims. If any of the valid PPOs are marked as pre-priced, the operator will have to choose. - You can also click
 to copy a previously entered effective date range. Select the
 FromandThru Datesand theUse First Valid PPOoption for the copied dates. - A
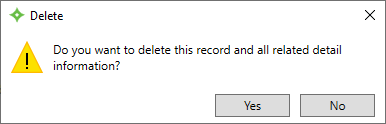
Detail Refnois assigned to the date range. - If you need to delete a date range, select the row you want to delete from the table and click .
- At the message, click
 to delete the effective date range or
  to return to the window without deleting.
 - After entering the dates, click or
 to cancel.
 - To update the
Default Scheduletable, click .
. - Select the
Schedule. - Choose the
Procedure Source RV CodeandProcedure Source UCR Code. - At
Ref Flag, chooseAif this schedule will only be used if the claim has an approved referral,Dfor a denied referral, or leave this field blank if no referrals are needed for this benefit plan. - At
M/O/D Flag(Medicare/Other Insurance/Dual COB), selectRfor required if the claim has a Medicare or other insurance prepayment orDfor dual COB coverage. If the claim has no Medicare or other insurance prepayment, select from other non-flagged schedules. Leave this field blank if all schedules are valid. - Click
 to update the table.
 - If you need to delete a schedule you added, select the row from the table and click
 .
. - To update the
PPO Schedulestable, click. - Select the
PPOandSchedule. - Choose the
Procedure Source RV CodeandProcedure Source UCR Code. - At
Fee Percent, enter the percentage for the internal PPO's administrative fee. - Leave the
Fee Flagblank if the administrative fee should be billed on the back end or selectBif this fee with be taken automatically on the front end. - Choose the
PCP. This determines PCP requirements for using the aligned schedule and other aligned information. - At
Ref Flag, chooseAif this schedule will only be used if the claim has an approved referral,Dfor a denied referral, or leave this field blank if no referrals are needed for this benefit plan. - At
M/O/D Flag(Medicare/Other Insurance/Dual COB), selectRfor required if the claim has a Medicare or other insurance prepayment orDfor dual COB coverage. If the claim has no Medicare or other insurance prepayment, select from other non-flagged schedules. Leave this field blank if all schedules are valid. - Click to update the table.
- If you need to delete a schedule you added, select the row from the table and click .
- Click to save.

Disability Schedules tab
On this tab, select the disability schedules to link to the benefit plan.

- Select the
Disability Schedulestab. - To update the
Disability Schedule Linkstable, click.- Select the
FromandThrough Dates. You must select aThrough Dateif theFrom Dateis in the future. - Choose the
Disability Schedule. - Click to update the table. The disability schedule's description displays automatically.
- If you need to delete a disability schedule you added, select the row from the table and click .
Note: From dates can't overlap for the same disability schedule. If you're entering more dates for the same disability schedule, ensure you first add a through date to the prior schedule row.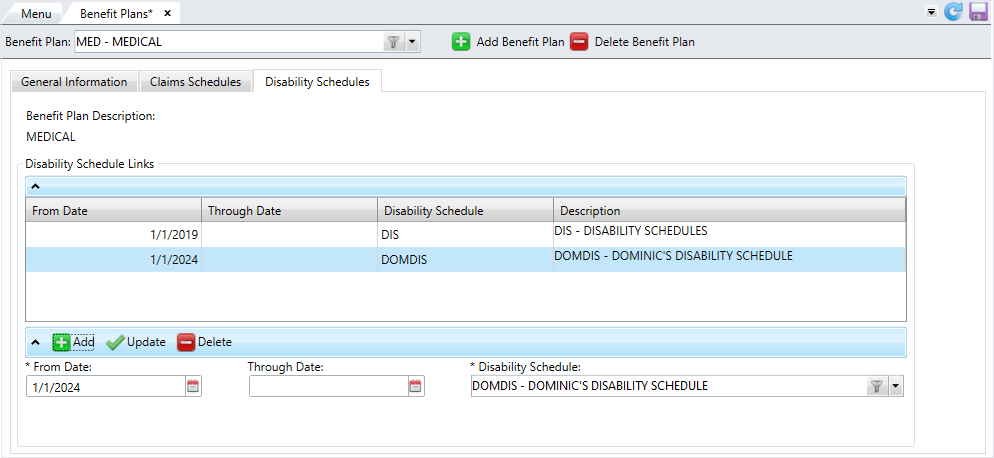
- Select the
- Click to save.
Edit a benefit plan
- Select the benefit plan to edit from the
Benefit Planlist. - Edit any of the information on the three tabs.
- After verifying your changes, click to save.

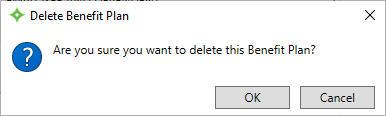
Delete a benefit plan
- Select the benefit plan to delete from the
Benefit Planlist. - Click
 .
. - At the message, click to delete the benefit plan or click to return to the
Benefit Planscreen. - If you selected , the benefit plan is deleted from the list.