Configure a template
When WriterXG is first installed or new templates are added, the templates have an Incomplete or New Status, indicating you need to add or update settings specific to your business needs before you can use them. When the status changes to Ready and all other configuration updates have been made, operators will see the WriterXG template options with the settings you’ve specified.
- From the
Template Listingstab, double-click the template to configure. - The template displays in a new tab.
* indicates a required field
| Field | Type | Description |
|---|---|---|
| Template Listings Tab | ||
| Template Name | View-only | The name of the template. |
| Category | View-only | The folder in Ecrion that groups the batch, interactive, and non-interactive templates (e.g. Annuity, Claims, Dependent, Disability, Member, Year End, Other, etc.). A starter set of categories is provided with each setup. |
| Template Type | View-only |
|
| Recipient Type | View-only |
The default receiver for the document. Options include Employer, Member, Dependent, Process Driven, and Provider. A Process Driven Recipient Type indicates that the CDO process determines the recipient type. |
| Data Source | View-only | This is how we plug and play our Data Sets into the basys platform, whether it’s individual or batch. |
| View-only | A Output or Print (if you select ECM Only, this doesn’t display). |
|
| Status | View-only |
The current state of the template:
|
| Template Information | ||
| Description | Text box | The description of the template. |
| Template Path | View-only | The directory path to the template file on the Ecrion website. |
| General Subtab | ||
| Template Type* | List | Select the template type for the template above. See Template Type above. |
| Data Source* | List | This is how we plug and play our Data Sets into the basys platform, whether it’s individual or batch. |
| View Schema | Button | Displays the content of the data source in a pop-up window. |
| Session Type* | List |
The type of session from which the data is derived:
The session type is inherited from the selected data source and the default option automatically displays . |
| Recipient Type* | List |
This is who receives the document. The options include:
|
| Recipient Entity Key* | List | The entity key is the item that identifies the recipient in the Data Source. This field is inactive (dimmed) if the Recipient Type is set to Process Driven (CDO). |
| Template Fund Security | List | Lists all funds in the system. Associating a fund to the template will only allow those with access to that fund to access the template. |
| Exclude Invalid Addresses | Check box | Select this check box to exclude any recipients with invalid addresses from this template. No letters are printed for recipients with invalid addresses, but PDFs and ECM images are still generated. |
| Correspondence Update | ||
| Fund | List | The fundCorrespondence module. |
| Type | List | This option is required after selecting a Fund. This is the correspondence type related to the Fund selected. Examples include, PEN ALERT, Phone Call, CORR Update, etc. |
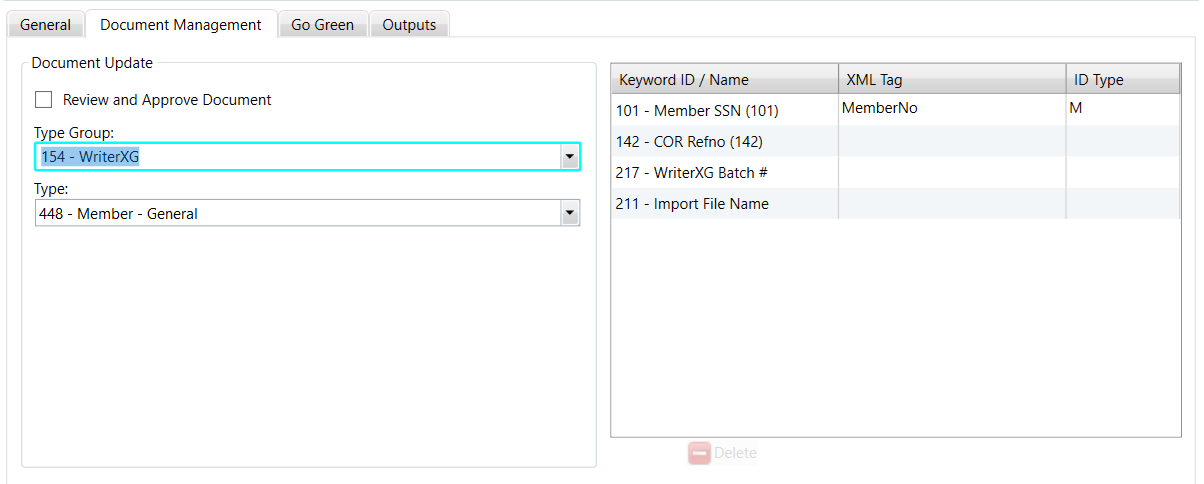
| Document Management Subtab | ||
| Review and Approve Document | Check box | Indicates the document won't be released until it's approved by an operator. See Document review process. |
| Type Group | List | The first level of the hierarchy for documents in the document management system. In other words, a Document Group contains Document Types which contains keywords. For example, a group type could be Checks. |
| Type | List | A description for the document type within the document group. An example of a document type could be Pension Check or Annuity Check. |
| Keyword ID / Name | View-only | A search term or index which aid in finding or organizing the document in your ECM. Examples could include, Claim Ref#, Date, Member Name, SSN#, etc. |
| XML Tag | List | Keyword tag for the document that exists in the data source. An example would be <Mem_Number>Member Number</Mem_Number>. |
| ID Type | List | This is an additional (optional) identifier for the Keyword and XML Tag in the document management system. Classification for keyword if needed. |
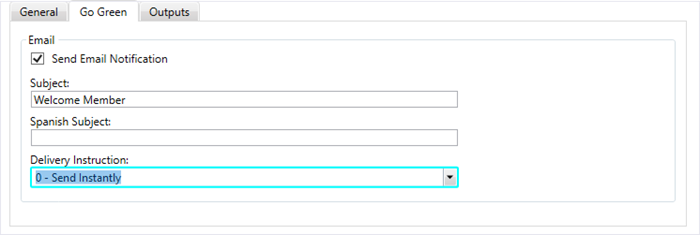
| Go Green Subtab | ||
| Send Email Notification | Check box | Indicates if an email will be sent to members informing them that their document is available in the MemberXG portal. |
| Subject | Text box | This is the email subject that will display on the email sent to the member to let them know their document is available in MemberXG. This field is required if you selected the Send Email Notification check box. |
| Spanish Subject | Text box | The Spanish language email subject that will display on the email sent to the member to let them know their document is available in MemberXG. |
| Delivery Instruction | List |
Indicates the time when the notification email will be delivered to the member. Examples include instantly (every minute), nightly (at or around the middle of the night on a daily basis), 5pm weeknights, or weekly (kicking off a weekend run process on a Friday evening to run potentially all weekend). This list can vary depending on your setup. If a template is part of the review and approve process and hasn’t been approved, the delivery option will be impacted. A document is held until it’s approved. |
| Outputs Subtab | ||
| Output | Radio button | Button that determines the settings for PDF output. |
| Radio button |
Button that determines the settings for a physical printer. After selecting this button, a list displays options for the printer tray:
|
|
| ECM Only | Radio button | Only active if you have a document management system. Button that indicates the output will be sent as an image to your document management system only. |
| Use Advanced Options | Check box | Displays the options for file naming, including keywords to include in a file name. |
| Combine Batch PDFs | Check box |
Combines the batch PDFs into one file rather than multiple PDFs when generating documents from the Note: This check box only displays when the template type is set to Batch.
|
| Output Option - Use Advanced Options | ||
| File Naming | Text box |
Enter the name of the output file using free form text and any keywords from the |
| File Name Keyword | List | The list of keywords to add to the file name. Examples include operator, template name, date, and time stamps. |
| Output Option - Combine Batch PDFs (available for batch templates) | ||
| File Name | View-only | The name of the file. |
| Sort 1 | View-only | Lists the sort tag, sort type, and sort order chosen for the sort 1 row. |
| Sort 2 | View-only | Lists the sort tag, sort type, and sort order chosen for the sort 2 row. |
| Sort 3 | View-only | Lists the sort tag, sort type, and sort order chosen for the sort 3 row. |
| Combine PDF | View-only | A green check mark indicates that PDFs will be combined. |
| Sort Enabled | View-only | A green check mark indicates that you’ve configured the sort options. |
| File Naming | Text box | Enter the name of the output file using free form text and any keywords from the File Name Keyword list. |
| File Name Keyword | List | The list of keywords to add to the file name. Examples include operator, template name, and date stamps. |
| Sort Tag | List | The tag by which the file will be sorted. This field consists of the same options listed in the Recipient Entity Key. Each sort tag must contain a sort order and sort type. You can add up to three sort criteria for the template. This field doesn’t contain any items that are a part of a data source’s grouping. |
| Sort Order | List |
The order in which the file will be sorted:
|
| Sort Type | List |
The character type by which the file will be sorted:
|
| Print Option | ||
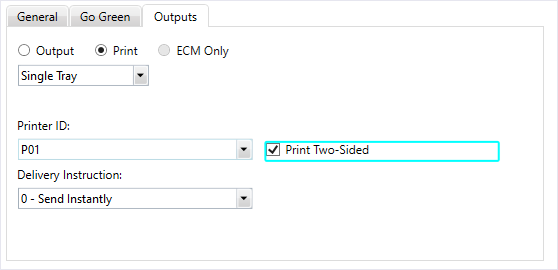
| Print List | List | Select to print with a Single Tray or Multi Tray. |
| Printer ID | List |
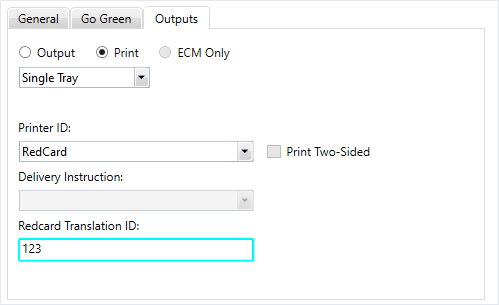
Select the network printer ID for the selected template output. The printer ID displays when generating a letter, but can’t be changed at that time. RedCard displays as an option if you use RedCard to print documents. Documents with the |
| Print Two-Sided | Check box |
The template will print on both sides (front and back) of the page. This setting doesn’t change the printer settings. Note: This setting is only enabled if you’re printing more than one (1) page. Your printer must be set up to print two-sided.
|
| Delivery Instruction | List |
Required, if Printer ID is selected. Examples of options which allow you to either send items to the printer:
Depending on your setup, you might have additional or different options. See the Task Scheduler for more information on configuring other delivery instructions. |
| Redcard Translation ID | Text box | If using Redcard printer, this field indicates file transformation rules, such as how to bill the document, the number of pages, and where the address needs to be located on the template. Add the translation ID to the template configuration so you can use different translation IDs or override a translation ID if needed. |
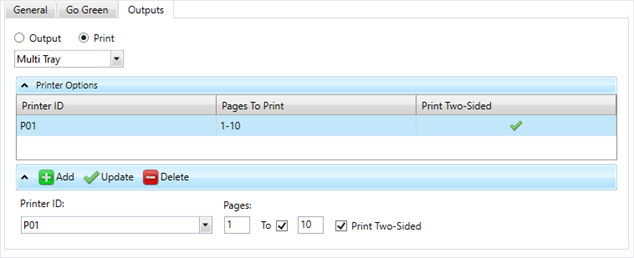
| Pages | Text box | Enabled for the Multi Tray option.The page number(s) to print. Enter a number or select the check box to enter a page range. |
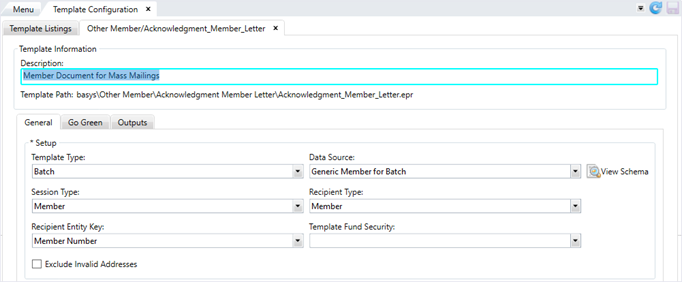
General Subtab
Template Information Section
- Enter the
Template Descriptionto give additional information about the template, instructions, process, or business rules.

Setup
- Select the
Template Type:BatchorNon-interactive. If the template isInteractive, this field populates automatically. - Choose or change the template
Data Source. - Data sources define the data sets that are used in the templates. Data sets consist of a collection of data fields.
- The data source you choose here will determine the data available for your statement.
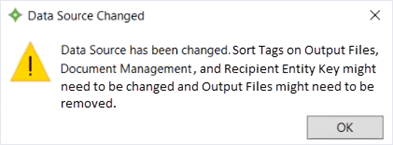
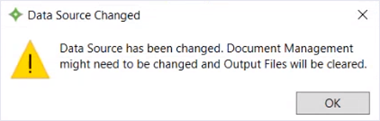
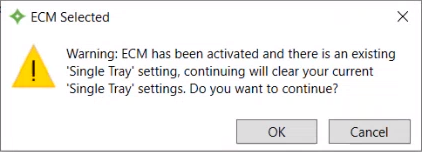
- When you change the data source, you might also need to change other settings for the template, as indicated in the below message:
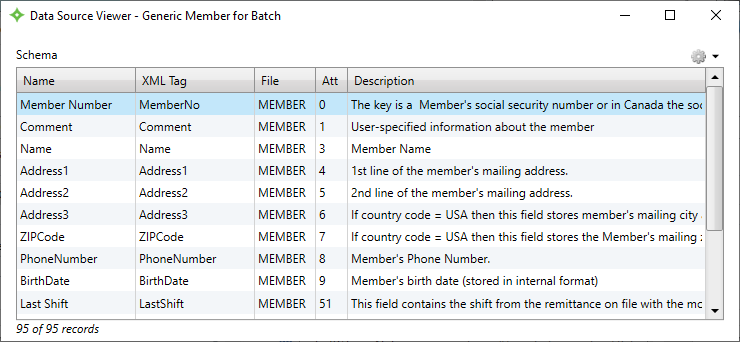
- You can select
 to display more detail about the data source in a new window. You can open multiple
 Data Source Viewerwindows and work inTemplate Configurationat the same time. Each window contains the name of the selected data source. - Next, select or update the document content’s
Session Type. This is the part of the software from which you’d like to generate this statement. - For any templates, that are process driven (CDO) (where the basys system determines the session type, select
Classic(Pend Letter or Pension statement templates). - Indicate who will receive the document. Select or update the
Recipient Type. The options includeDependent, Employer, Member, Payroll Audit, Process Driven,orProvider. - Select how the recipient is identified with the
Recipient Entity Key. For example, if you choseMemberas theRecipient Type, you would most likely chooseMemberNoorSSNdepending on the data in your template. You won’t need to choose aRecipient Entity Keyfor templates with a Process Driven (CDO)Recipient Type(choices made during the basys system process determine the recipient type). -
In
Template Fund Security, choose a specific fund to restrict access to the template. For example, you select123P – Pension Fundfor the Pensioner Check template. Brenda Operator doesn’t have access to that fund, and she won’t be able to generate the 123P — Pension Fund Pensioner Check. See Add or update user roles. - To prevent sending information to recipients that have a mailing address with an
Invalid Addressindicator (within the member, dependent, employer, or provider demographic subtab), click theExclude Invalid Addresscheck box. - When creating an on-demand document for someone with an invalid address, a message displays and the operator can choose to continue or not.
- Records with invalid addresses will be listed in the validation report for the
Create Batch Lettersprocess. - Any classic or process driven (CDO) templates automatically exclude any recipients with an invalid address. No message displays.
Batch template
Non-interactive template
Classic data source won’t display on the Create Letter or Create Batch Letters screens.Recipient Type means that the basys system process determines the recipient. For example, the claims EOB statements and checks go to the member, provider, third party, or both — select Process Driven for the Recipient Type.Review and Approve Document check box on the Document Management subtab), the document approver must have permissions to view that fund.Correspondence Update (applies only if you have a document management system)
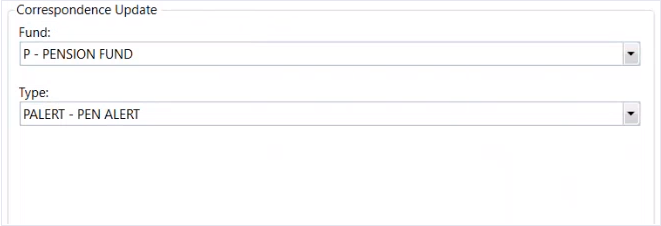
- Select a
Fundto associate with the template. - Next, select a correspondence
Typefrom the available options. - Click
 to save your updates.
Document Management subtab
- Click the
Document Managementsubtab. - If the template you selected needs to be approved before it’s printed, sent, or saved, select the
Review and Approve DocumentPrint Managementqueue. - This option is only active if you have active document management credentials.
- Selecting this option will delay the print or email Delivery Instruction and any
Correspondencetab updates until it’s approved. For example, you select the Delivery InstructionSend Instantlyand select theReview and Approve Documentcheck box for a template. Brenda Operator can’t print or send the output to a recipient until it's approved. Once approved, it will print or save (depending on how it’s configured). If it’s rejected, it will never produce an output. It’s important to develop an internal approval / review process. - If the document is rejected and was produced as a result of multiple process steps (examples include creating checks or COBRA letters), you’ll have to restart the process to recreate the rejected document.
- Select or change the
Type Group. - Select a
Typefrom the list. The options depend on theType Groupselected. - The associated keyword table updates based on your selections. Select document XML tags and ID Types for search terms or index words (metadata) used in document and image retrieval.
- Click the
Keyword ID / Namerow to add anXML TagorID Type. - Click into either the associated
XML TagorID Typecolumn and select an option from the list to apply to the template's metadata. - Continue to update keywords as needed.
- Click to save your updates.
Go Green Subtab
- Click the
Go Greensubtab. - To send an email to the members, click the
Send Email Notificationcheck box. - Enter the subject line for the member document notification email in the
Subjectbox. - If needed, enter the
Spanishsubject. - Select the
Delivery Instruction(the timing for when the notification email is delivered) from the list. The delivery instructions will vary, depending on your setup. See the Task Scheduler for more information on configuring your own delivery instructions. - Click to save your updates.
Outputs subtab
- Click the
Outputssubtab. - Select the
Output,Print, orECM Onlyradio button to configure settings for the output, printer, or uploads to your document management system. See the directions for each option below. - Select
Outputto generate PDFs. Then, determine if you’d like to select theUse Advanced OptionsorCombine Batch PDFscheck boxes: Use Advanced Options— Select this option to customize the name of your file, instead of defaulting to the refno as the file name. Customize your output with a distinct file name including keywords to facilitate organized archiving and distribution. This option to name your output file works with both batch and on-demand templates (both interactive and non-interactive).Combine Batch PDFs— Select this option to consolidate all items in the current batch into a unified PDF document, streamlining distribution and creating fewer individual files. With this option, you can also customize the file names with keywords. However, you can further influence the arrangement of items inside the combined PDF based on specific XML tags. Configure up to three (3) distinct file names with up to three (3) unique sorting criteria per designated file name. This option to combine your PDFs and create file names and sort criteria works with batch templates only.- Click the
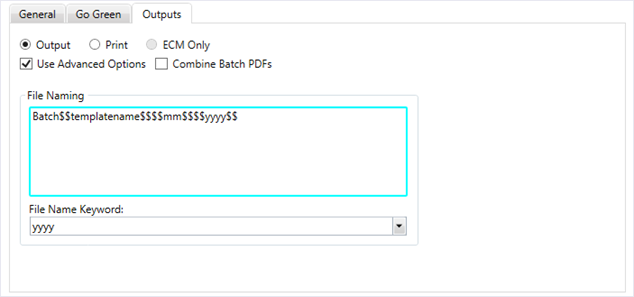
Use Advanced Optionscheck box to display file naming options. - Enter the name of the file in the
File Namingtext box. Enter your free form text and keywords in any order. Keywords can display before or after your text. This example uses the text “Batch”. - Select any keywords to include in the name from the
File Name Keywordlist. Examples of keywords include the year, month, date, operator, or template name. The$$symbol displays around the selected keywords. For example, the file nameBatch$$templatename$$$$mm$$$$yyyy$$contains the word “Batch,” template name, month, and four-digit year. - Click to save your changes.
- Click the
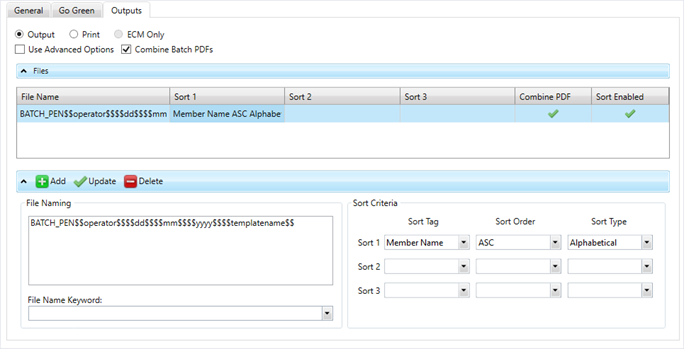
Combine Batch PDFscheck box to combine the batch letters into one single batch PDF. From here you can also configure the file naming and sort criteria options. These fields let you choose the criteria by which you can name the PDF and sort the letters in the batch. - To add the file naming for the batch document, click
 .
. - Enter the name of the file in the
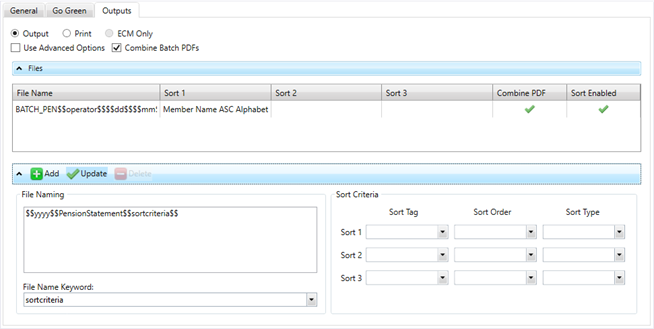
File Namingtext box. Enter your free form text and keywords in any order. This example uses the text "PensionStatement." - Select any keywords to include in the name from the
File Name Keywordlist. Examples of keywords include the year, month, date, operator, template name, or sort criteria. The$$symbol displays around the selected keywords. For example, the file name$$yyyy$$PensionStatement$$sortcriteria$$contains the four-digit year, the text “PensionStatement,” and sort criteria. - To create the sort criteria, select the
Sort Tag. The options that display are the same as theRecipient Entity Keyand come from the data source. Note that items that are part of the data source’s grouping don't display in this list. - Then, select the
Sort Order(ascending or descending) andSort Type(alphabetical or numeric). You can add up to three (3) sort criteria for the file name. - Click
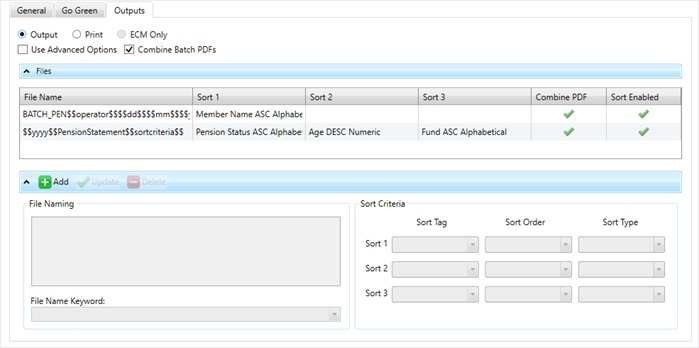
 to update the table with the file name and sort criteria. Add up to three (3) file names for the template.
 - Click to save your changes. When you generate the template from the
Create Batch Lettersscreen or CDO process, the output will be sorted by the criteria you chose. - If you're editing multiple templates at once, ensure you save each template separately. Clicking only saves the current screen displayed.
Single Tray— All items in your run will be directed to the designated printer or its specific tray. Choose this option if your batch is a basic letter or document printed on regular printer paper.Multi Tray— Assign specific pages to targeted printers or distinct trays. Choose this option if your batch is both checks printed on check stock and other supporting documents printed on regular paper.- Choose either
Single TrayorMulti Trayfrom the list: - Select the following
Single Trayoptions: Printer ID— Select the network printer ID. The printer ID displays when creating a letter, but can’t be changed.- If there is a printer ID for a MemberXG member’s document that hasn’t selected to GoGreen (paperless), the document or batch will always print.
Redcarddisplays as an option if you use the third-party vendor RedCard to print your documents.- The
Delivery InstructionandPrint Two-Sidedoptions are disabled if RedCard is selected. - If you didn't select the
Review and Approve Documentoption, you might want to select it now to review the documents prior to the final send to RedCard. An informational message will display once you save, suggesting that you select this option. Print Two-Sided— Click thePrint Two-Sidedcheck box for any documents that need to print on both sides (front and back of each document page). Only select this option for multi-page documents and printers with duplex printing enabled. Note that selecting this option doesn't change any printer settings. If you select this option for a printer that isn't set up to print on both sides, the document will only print on one side and no warning message displays.Delivery Instruction— Select an option from the dropdown list to choose when to send items to the printer. The options that display vary depending on your setup, but some examples include:0— Send Instantly1— ECM Load NotificationRedcard Translation ID— Enabled if you choseRedcardas the Printer ID. Enter theTranslation ID, which determines how to bill the document, the number of pages, and where the address is located on the template. Add the Translation ID to the template configuration so you can use different Translation ID or override a Translation ID if needed.- Select the following
Multi Trayoptions: - Click .
- Select the
Printer ID. - In the
Pagestext boxes, enter the page(s) to print. Click theTocheck box to add a page range. - Click the
Print Two-Sidedcheck box for any documents that need to print on both sides (front and back of each document page). - Click to update the table.
- Click to save your changes.
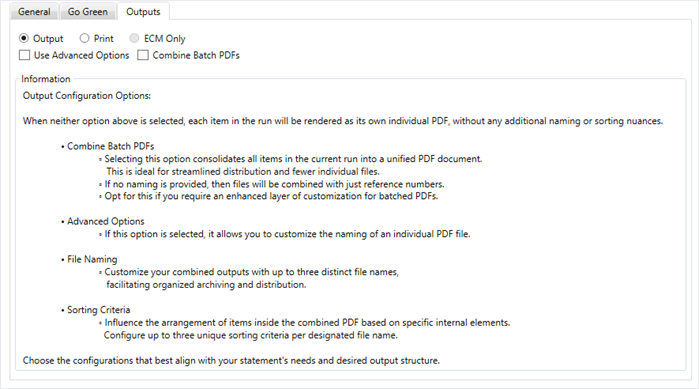
ECM Only option only displays if you have active document management credentials.Output Option
Use Advanced Options or Combine Batch PDFs check boxes, each item in the run will be rendered as its own individual PDF, without any additional naming or sorting nuances.

Print Option
Print the batch to a printer. Configure the settings for either:

ECM Only Option
Select this option to generate an image for direct upload to your document management system. ECM Only won’t generate a PDF or printed output.
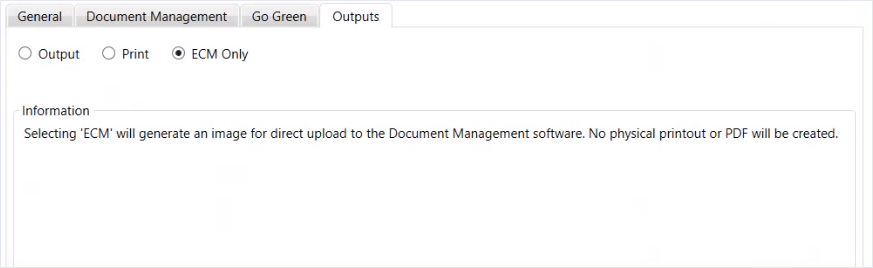
- Select
ECM Onlyto upload an image to your document management system. You can view the image in the respectiveCorrespondencerecord (member, dependent, employer, etc.). - Click to save your changes.
Outputs subtab without saving your updates. The below example displays a message if you selected ECM Only and had previously configured the template to generate with the Print Single Tray option.
All templates that include basys functional data need to be linked to a basys process. See Process to template links for information on linking your templates with the defined processes.