Send portal invites
Once you’ve added the provider contacts in ServiceXG, use the Contacts screen to email contacts their invitations to create their provider portal profiles. See Add, update, or delete a provider contact for more information about provider contacts.
Important! Providers don't need contacts to register for a ProviderXG account. The individual that registers the provider through the ProviderXG portal registration process is granted administrator access, and they can use ProviderXG to invite additional users to the portal. They don't need to be the primary contact in ServiceXG. You can invite additional users to the portal using this process in ServiceXG.
- Search and open a provider record.
- Select the
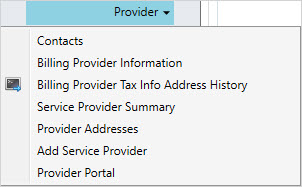
Providermenu and thenContacts. - The
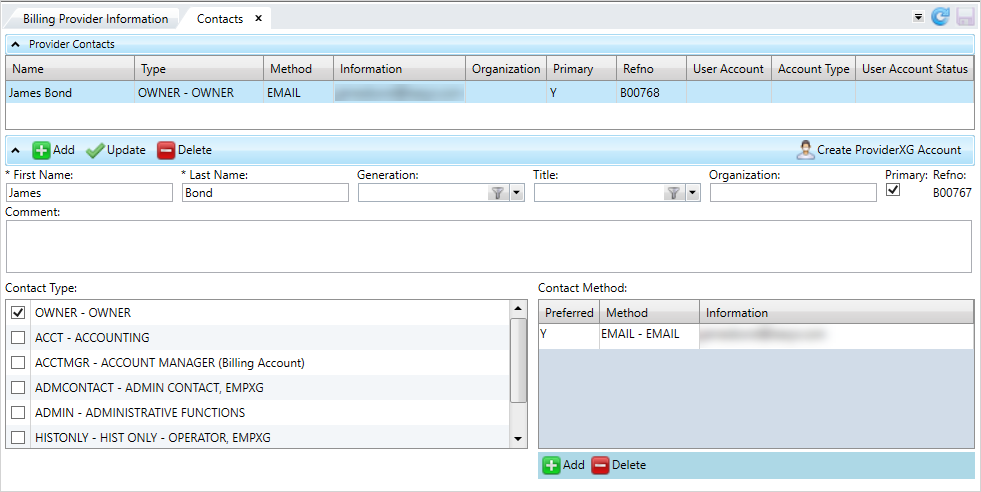
Contactsscreen displays any of the provider's contacts. - Click the contact to invite in the
Provider Contactstable. - Click
 .
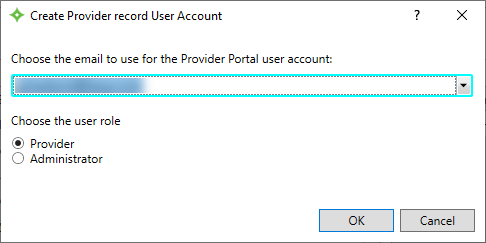
. - Select the contact’s email to use for the portal profile and choose the user role (Provider or Administrator), then click
OK. - Click
 to update the
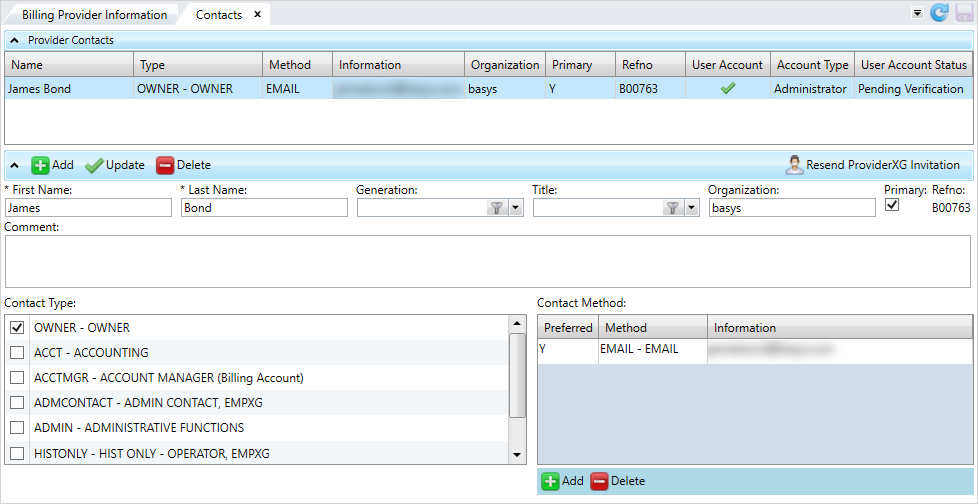
 Provider Contactstable. TheAccount Typecolumn displays the contact's role and theUser Account Statuscolumn updates to Pending Save. - Click
 to save and send the invite to the selected email address. The
 User Accountcolumn displays the contact's email address to indicate that you've sent the invite and theUser Account Statuscolumn updates to Pending Verification. - Based on your office’s standards, inform the contact that they’ve been emailed an invitation to set up their provider portal profile.
- Once a contact accepts the invitation, their
User Account Statusdisplays as Verified.


Resend invitation to the portal
If a contact hasn't accepted the invitation, you can resend an invite to a contact with a Pending Verification status.

- To re-invite a contact to the portal, select the contact from the table and click
 .
. - In the
Resend ProviderXG Invitationwindow, clickOK. - Select the email to use, choose the user role, and click
OK. - Click
 and
and  to save and resend the invitation.
